
There is an old saying in the chef world, a Sharp Knife is a Safe Knife. A properly sharpened knife not only makes the food preps easy and enjoyable; it also decreases the chance of accidents caused by user fatigue and excessive forces.
All knife users will need to sharpen their knives at some point during their works. Choosing the right sharpening tools and sharpening techniques can be a daunting task for new or casual knife users. In this blog, I will briefly go through some different sharpening tools and share my thoughts about them.
First and foremost, each sharpening tool and method has its own pros and cons, and there is no “best” sharpening tool or method. Your decision should always be based on your budget, environment, and intended usage, as well as sharpening experiences. Currently, there are three main types of sharpening tools that are widely available on the market. Namely, the angled sharpening tools, guided sharpening systems, and whetstones.
Angled Sharpener
To begin with, the set-angled sharpening tools usually have several preset angles on them. To use this tool, the users place the knife in the sharpener and let the edge contact the sharpening rod/stone, and pull the knife to get the edge sharpened.
There are several advantages of using this tool:
First, the angled sharpening tools are usually quite compact, which means they don’t take up large storage space, some of the angled tools are even smaller than a smartphone, which allows the user to carry them for emergency use.
Second, this type of sharpener is very easy to use, most users can have a decently sharpened edge without too much prior knowledge about how to sharpen a knife.
Third, most of the angled sharpening tools are not expensive.
On the flip side, the users won’t be able to change the sharpening angle while using the tool, and the sharpening tends to remove more materials than other sharpening options. Last but not least, while the angled sharpening tool is easy to use, it is almost impossible for the user to get a dedicatedly sharpened edge.
Guided Sharpening Systems
Now, let’s talk about guided sharpening tools. These tools usually contain multiple sharpening hones/rods/stones of different grits. The users set up the system, and use the long guiding rod (equipped with sharpening hones) to sharpen the knife. Like the angled sharpening tools, some guided sharpening systems have preset angels for the users to choose from. Some guided systems even allow the users to have more than 10 sharpening angels.
The biggest advantage of the guided sharpening systems is that experienced users can sharpen their knives to an extremely fine state. With some practices and the right sharpening materials, many users can make their knives hair-splittingly sharp. If the users choose high grit materials such as glass hone or sapphire hone, they can even put a nice mirror finish on the edge.
With that being said, several things need to be considered before you dive into this system:
First, most qualities guided sharpening systems cost much more than angled sharpeners.
Second, this system requires a large working space.
Third, some users may find it difficult to use this system to sharpen large knives (10 inches or more), and it will be difficult to use this type of sharpening system to sharpen recurve blade or tanto blade.
The guided sharpening system is mostly used by folding knives and small fixed-blade collectors. While some large commercial grade guided sharpening systems are available, they tend to be only used by professional chefs.
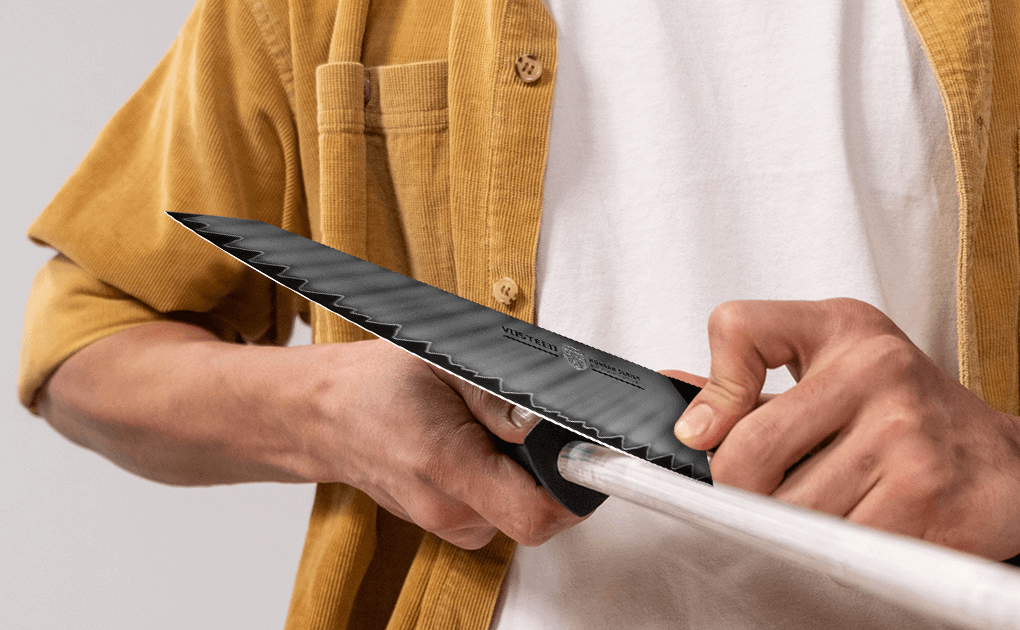
Whetstone
Let’s talk about whetstone now. Whetstone is easily the most widely used and oldest sharpening tool in the world. The history of the whetstone is as old as the knife itself, and they are the most versatile sharpening tools among the three. However, to properly use the whetstone, users need some practice.
In general, to use the whetstone, the users need to soak the stone or wet the surface of the stone. After the surface is wet (by water or by sharpening oil), the user will place the whetstone on a flat surface. Then the users need to find the optimal angle based on the knife style or the manufacture's recommended angels (keep the same angle throughout the sharpening process).
A quick tip for finding the original angle is to use a sharpie and mark the original sharpened edge. After you mark the edge, you hold the handle with your preferred hand and apply a small amount of pressure on the spine of the knife with your thumb. During this process, you should be able to feel the original sharpened angle on the knife. Then you use the other hand, place three of four fingers right above the edge and put some pressure while you push and pull the knife on the whetstone.
To begin the sharpening process, you slide the knife blade forward along the whetstone, move the knife away from your body. When the knife has reached the end of the whetstone, you lift the blade and repeat the process. Less pressure should be applied while you push the knife forward. After doing this 3 or 4 times, you need to check the sharpie mark on the edge to see whether it has been properly erased. If the sharpie mark is not erased, you need to adjust your sharpening angle.
Some pros suggest that during the sharpening process, people should begin with the heel of the blade and work all the way up to the tip. There are some good videos about how to use the whetstone and we will add the links at the end of this blog.
I use whetstone for all my chef knife sharpening tasks, and I enjoy the Zen feeling of the sharpening system. With that being said, there is a long learning curve of how to properly use the whetstone, and I recommend you to use some cheap knives to practice.
If you have any more questions about how to sharpen your knife, you can always find me and other knife users in our Facebook Vosteed Owner Group.
1 comment
Smith Waugh
Thank you for this invaluable guide on knife sharpening techniques! Your detailed instructions and recommendations for sharpening tools are a game-changer for anyone looking to maintain their knives.
Leave a comment
All comments are moderated before being published.
This site is protected by hCaptcha and the hCaptcha Privacy Policy and Terms of Service apply.